Monitoring
By default, AWS Lambda publishes all logs and general metrics (HTTP response time, code execution duration, etc.) to AWS CloudWatch.
It is possible to view these logs and metrics directly in the AWS console (opens in a new tab). However, the CloudWatch UI can be complex and overwhelming.
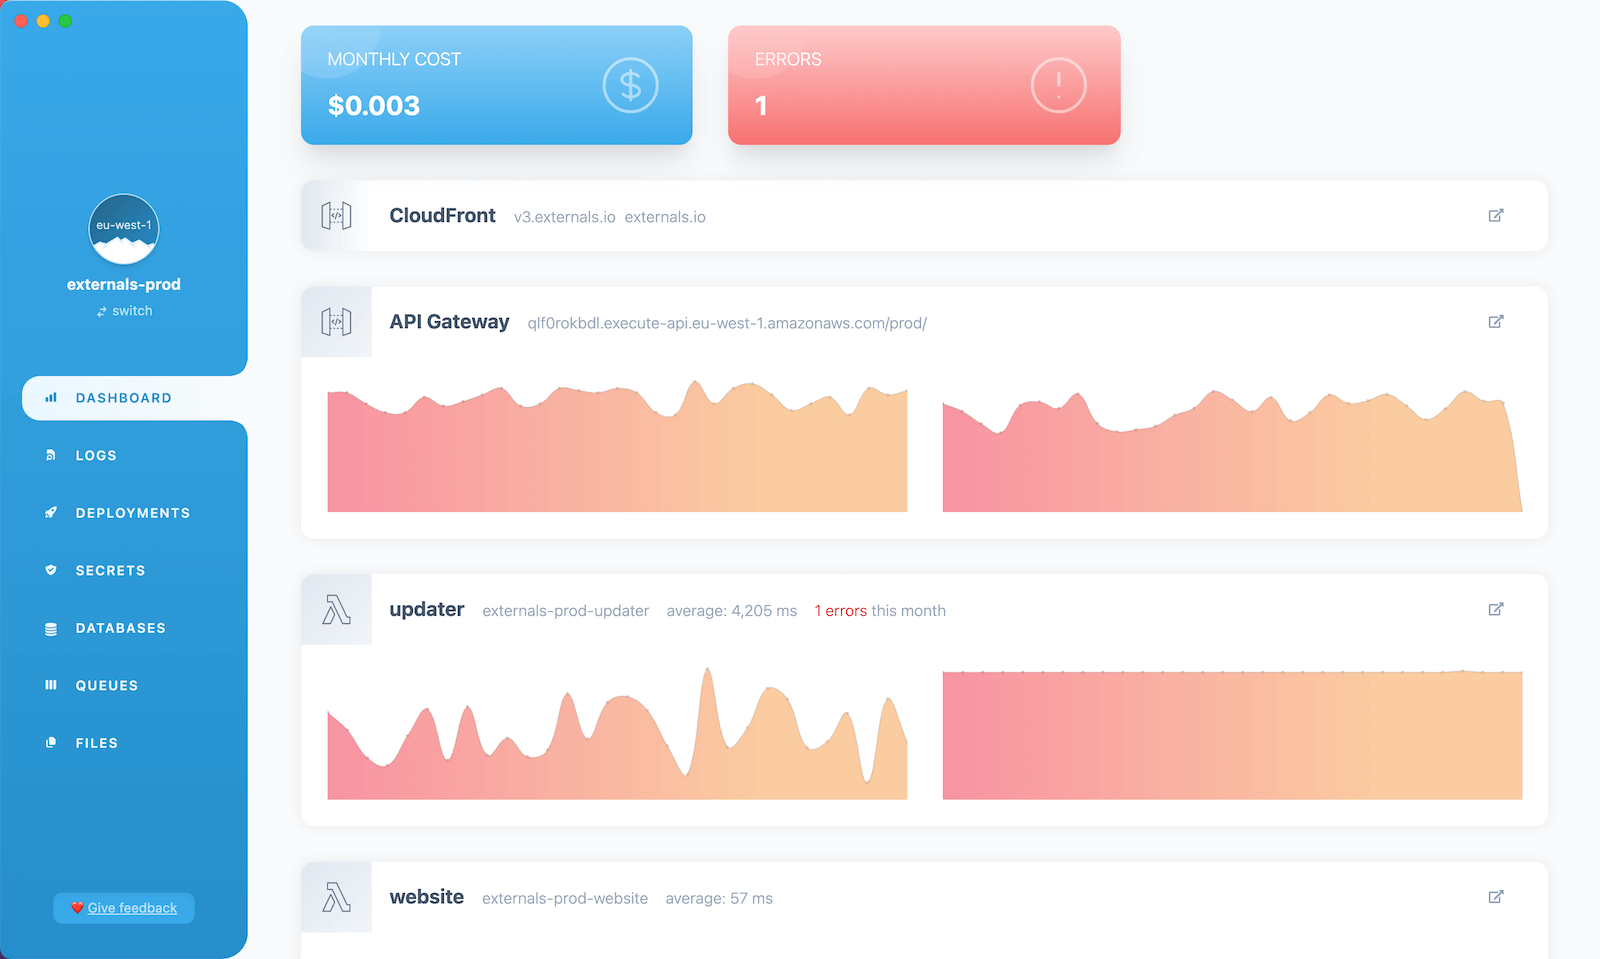
As an alternative, we can use Bref Cloud or the Bref Dashboard (opens in a new tab) to view these logs and metrics. It provides a simpler UI designed for serverless PHP applications.
For advanced metrics and profiling, we can use Tideways (opens in a new tab), or Sentry's performance monitoring. Note that Serverless.com's Dashboard (opens in a new tab) is not compatible with PHP.
To summarize:
- General monitoring: Bref Cloud, CloudWatch, or Bref Dashboard (opens in a new tab)
- Advanced monitoring and profiling: Tideways (opens in a new tab), Sentry
Bref Cloud
Bref Cloud is an all-in-one platform for serverless PHP applications. It provides a simple UI to view logs, metrics, and errors, and it is designed specifically for PHP applications running on AWS Lambda.
Bref Dashboard
As mentioned above, the Bref Dashboard (opens in a new tab) fetches data from AWS CloudWatch (which is published by default by all serverless applications). As such, it requires no setup in AWS and can be used straight away.
Tideways
Disclaimer: Tideways is a Bref sponsor ❤️
To use Tideways (opens in a new tab) with Bref, we first need to create a Tideways account (opens in a new tab).
Next, we will need to set up two pieces:
- the Tideways PHP extension must be added to the PHP application running on Lambda
- the Tideways daemon must be started in an EC2 server instance
Indeed, the PHP extension runs in the same process as the PHP application and collects traces and advanced metrics. It then sends this data to a Tideways daemon, that will collect it and forward it to tideways.com. That ensures the PHP extension does not add latency to the PHP application.
The connexion between the PHP extension and the daemon needs to be secured. This is why the PHP lambda and the EC2 instance need to run in a VPC (virtual private network), and the EC2 instance should only be reachable from inside the VPC.
Complete example
The sections below describe how to set up the daemon and PHP extension manually.
Alernatively, you can have a look at a complete and deployable example: github.com/tideways/bref-tideways-example (opens in a new tab). In this example, we deploy the PHP application, the VPC and the daemon in one command via serverless.yml.
Setting up the daemon
Assuming we already have a VPC set up (the serverless-vpc-plugin (opens in a new tab) is a good solution to create one), the daemon must be started in the VPC.
- Open the Launch instance panel in EC2 (opens in a new tab)
- Make sure you are in the correct AWS region
- Search for
tideways-daemonin the Community AMI (Amazon Machine Image) catalog- If you want more details, learn more about the Tideways AMI (opens in a new tab)
- Select the
t2.microinstance type as it is the smallest instance and will do the job here - Optionally select/create an SSH key pair if you want to SSH into the server later
- Edit "Network Settings":
- Select your VPC
- Select a subnet with outgoing internet access (the daemon needs to reach tideways.io)
- If you created the VPC, it is usually called a "public" subnet
- If you are using the default VPC (created by AWS), you can pick any subnet
- Enable "Auto-assign public IP"
- Add a "Security group rule" that only allows Lambda functions:
- Type: "Custom TCP"
- Port range:
9135(the port Tideways uses) - Source type: "Custom"
- Source: select the security group used by your AWS Lambda functions (usually called the "AppSecurityGroup" or similar)
- You can leave the rest of the default settings and create the EC2 instance
Once the daemon has started, copy its "Private IP DNS name", we will use it to configure the PHP application.
Setting up the PHP application
First, let's install the Tideways PHP extension (it is distributed via the Bref extra extensions):
composer require bref/extra-php-extensionsEdit serverless.yml to add the plugin:
plugins:
    - ./vendor/bref/bref
    # Add this line:
    - ./vendor/bref/extra-php-extensions
Edit all your functions to add the Tideways extension layer:
functions:
    my-function:
        handler: index.php
        layers:
            - ${bref:layer.php-81-fpm}
            # Add this line:
            - ${bref-extra:tideways-php-81}
Make sure to use the same PHP version as the one for the PHP layer.
Next, we can configure the Tideways extension via environment variables:
provider:
    # ...
    environment:
        # Set your Tideways API key here
        # Read about setting secrets in serverless.yml: https://bref.sh/docs/environment/variables.html#secrets
        TIDEWAYS_APIKEY: '...'
        # Name of the service, used in the Tideways UI
        # https://support.tideways.com/documentation/setup/configuration/services.html
        TIDEWAYS_SERVICE: ${self:service}
        # We point the PHP extension to the Tideways daemon EC2 server
        # Edit the value to use the "Private IP DNS name" of the daemon server
        TIDEWAYS_CONNECTION: 'tcp://<daemon-private-domain-name>:9135'
        # 10% sample rate for the example, adjust to your needs
        # https://support.tideways.com/documentation/setup/configuration/sampling.html
TIDEWAYS_SAMPLERATE: 10Note:
The
TIDEWAYS_CONNECTIONvariable should contain the "Private IP DNS name" of the Tideways daemon (for exampletcp://ip-172-31-4-74.eu-west-1.compute.internal:9135). This is the value you retrieved in the previous section.
Don't forget to redeploy the application:
serverless deployMetrics for your application should now show up in Tideways.

